|
|
|
| TurboViper's Do It
Yourself Cold Air Intake |
|
| In this DIY,
I will show you how to take the fender cover off to access where your
filter will be going and how to remove the stock intake system. You will need the following items to complete this project: 1 3'' X 8' either Dryer Exhaust Ducting or Water Heater Exhaust ducting from home depot 2 3'' "PlumbQwik" coupler for "sewer and drain use only" from home depot 1 3'' Dryer Duct Aluminum Coupler 1 Roll of Aluminum Tape 1 K&N 3'' Cone Air Filter or any 3'' cone filter 1 3'' Bypass Valve (optional but recommended). You will need the following tools to complete this project: 1 10MM wrench 1 10MM Socket 1 Extension 1 Ratchet 1 Phillips Screw Driver Cost of this project is from $45-65 depending on if you use a bypass valve and/or a K&N cone filter. Note: In the pictures below I use 2 cars as a refrence, one is my 1986 Acura Legend and the other is my 1988 Acura Legend (my daily driver) so you will see 2 different color cars in the pictures. Also, you do not have to remove the battery to do this project but it is much easier with it out. In the pictures I have the engine/battery out because I'm rebuilding this legend so dont think that you have to do all of that just to do this project =) |
|
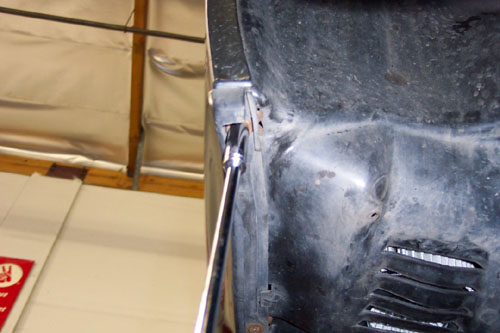
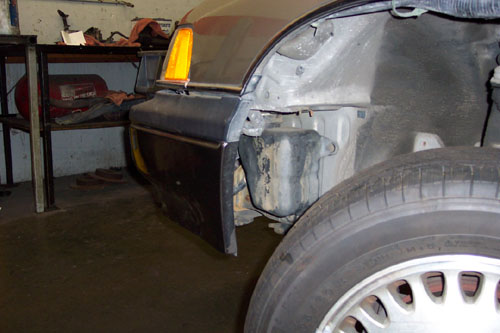
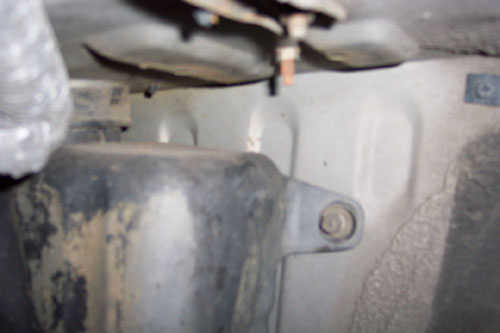
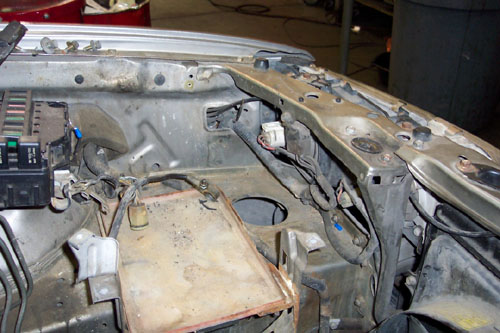
| 1. Remove the fender
cover and pull it out of the way in order to remove the intake
resonator. Pull the fender cover back towards the tire and prop it so
you can work easily inside the fender witout it hitting you. |
 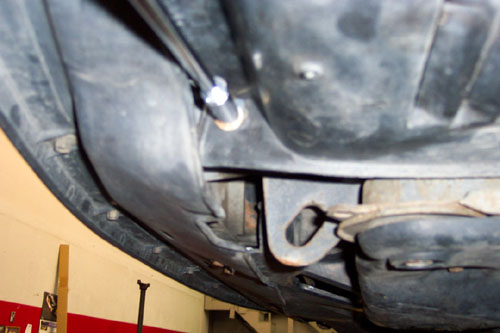   |
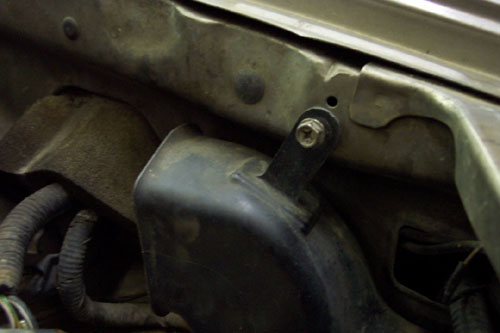
| 2. Remove the resonator box by
unbolting the 2 10MM bolts on it. Once you have done that disconnect
any vacume hoses/connectors on it (88 and up only) and remove the box
by pulling down on it. |
 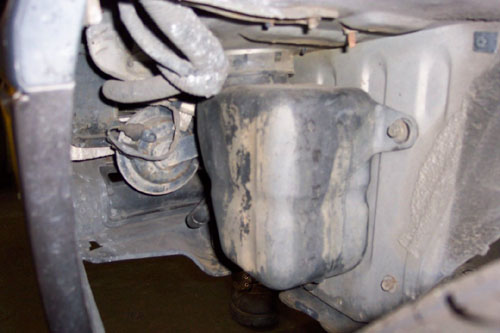  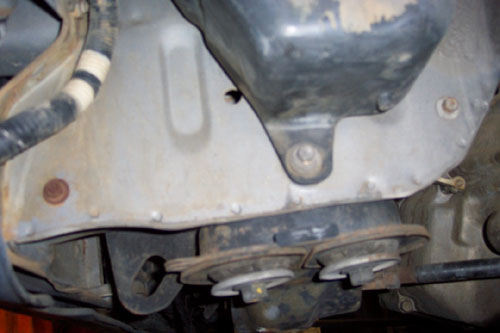  |
| 3. Remove the stock air cleaner box
and tubes. Take off the 2 10MM bolts to the left of the battery that
hold the air cleaner box down, also take off 1 10MM bolt that is
screwed into the drivers fender. Unclamp the hose clamp on the front of
the air cleaner box by un-cliping it. unclamp the hose clamp on the
back of the air cleaner box by loosening it with a phillips
screw driver. Remove all of the peices except the
piece that connects on
the back side of the air cleaner box. To remove the hose that attaches
to the hole where the resonator box was push on the tabs inward and
upward to pull it out. |
  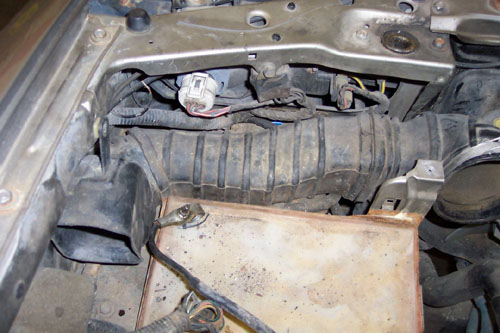 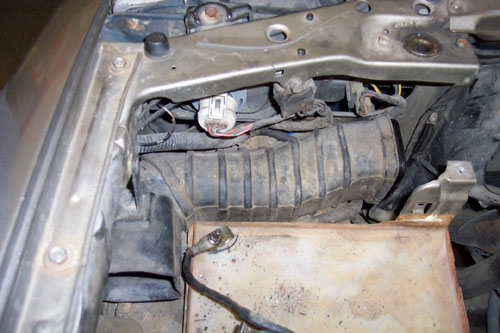 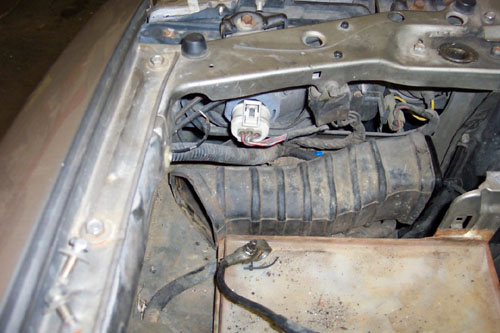 |
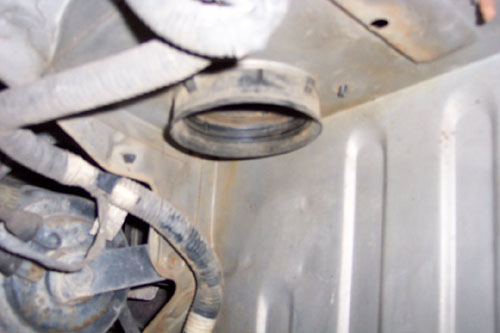
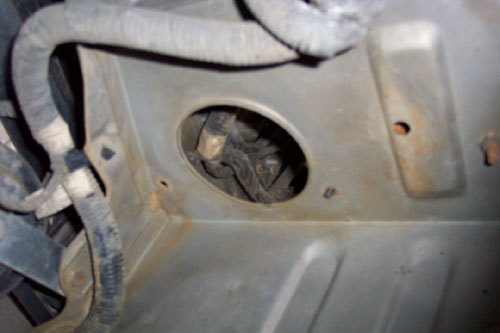
| 4. Your complete intake system
should be removed from the airbox on. The hose that connects to the
engine should still be there. You need that to connect your ducting to. |
   |
| 5. Run your ducting from the
throttle body hose forward, around the battery and down into the
fender.
It should look something like the pictures below, doesnt have to be
exact, but close =) |
  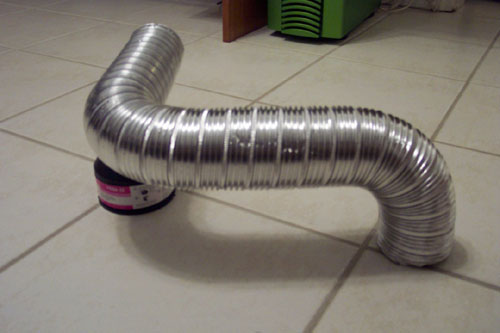 |
| 6. Take your
3'' dryer exhaust coupler and wrap it completely in aluminum tape so
that it is about 2MM thick. Put the coupler about half inside the stock
hose that comes off the throttle body and clamp it down. Next take your
exhaust duct hose and take one of the hose clamps off of the other 3''
coupler then slip it over the ducting. Next, slip the ducting over the
3'' coupler as far as it will go and clamp the hose clamp down on the
ducting hose (be sure not to rip the ducting but clamp it down to where
it starts to slightly crush the duct to be sure there arent any leaks). |
No Picture necessary. but you should be able to figure it out without them for now. |
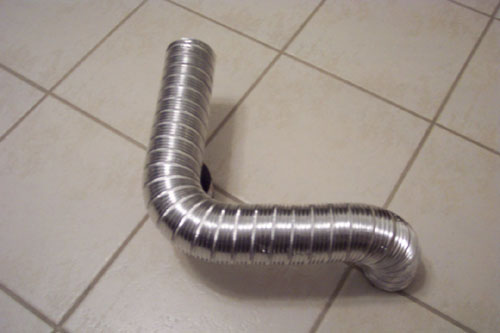
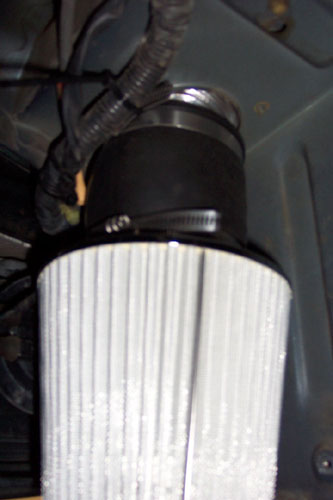
| 7. Cut your ducting to the right
length with some cisors, about 3'' below where it comes into the fender
area. Next connect the coupler to the filter and clamp it down so that
it wont pull of easily. Next put the filter and coupler up in the
fender, connect the coupler and the ducting so that about 2-3'' is
inside the coupler then clamp the hoseclamp down so that the filter
wont fall of too easily. It should hold its own weight up if it is
attached properly. If you would like, you can ziptie the end of the
hoseclamp to a harness in the fender (thats what I did) to be sure that
the filter wont go anywhere, even though the fender cover should push
on it and keep it in place. |
     |
| 8. Now just put everything back together and go have some fun =D |  |